Tuesday 28 May 2013

Ratio - its in the bag


Ratio – its in the bag


The problem
Ratio can be a difficult concept to understand. Like fractions you can teach it year after year, think you’ve succeeded but year after year it has to be retaught. The idea has not sunk in, the long term memory has not been troubled, it seems as if you are presenting the pupils with a totally new subject. What is to be done? How can we make our teaching more efficient, reduce the frustration felt by our kids and us? This is how to teach finding the ratio of a quantity.

The solution
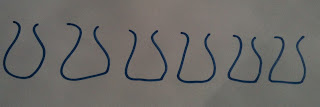
Using this method I have had a great success, although we as teachers nothing is ever 100%, that’s the problem with teaching humans! First I explain that the head teacher (principal for my readers in the States) has given me £120 for the class as a reward for outstanding progress in Mathematics. I tell them the money is in easy to carry bags; in fact there are 6 bags in all. At this point I draw the 6 bags on the board.


The question is now posed ‘How much is in each bag?’ Back comes the reply £20. I fill in £20 in each bag, this is a vital step.


This step is a huge reminder to the kids and really helps them to find an answer to the question posed, I am always amazed that even some very bright pupils persist with this method long after they have progressed beyond this level of Mathematics so it must have a lot of value.

I now drop the bombshell on the class, I am going to give them one bag, and I’ll keep the other five. On the drawing I put in the colon. As you can imagine this is not always greeted with total approval.


At no point have I mentioned ratio. I now introduce the word and write on the board the numbers

1:5

You have now laid the groundwork for explaining ratio. Introduce the word ratio and say when you share out any quantity the colon is used to show who gets what. I always emphasize that ratio is really sharing. I do several other examples on the board, always drawing the bags, always writing the amounts in each bag. I then give the pupils an exercise on ratio, encouraging them to do the drawing of bags putting the amount in each bag and hence finding the answer.

Friday 24 May 2013

Geometry – what’s that shape?


Want to do something different in your classroom? I am sure I pinched this idea from a board game, but can’t remember what the game is called. I first tried this idea out with a class of 13 year olds. I thought if it went wrong it didn’t matter, who would know. As the class came in so did a young lady, she was a teaching student following the class. Before I could start another student appeared and asked if she could watch my Maths lesson, she was an English student teacher but needed to observe other subjects in action. No problem I said but was beginning to feel a little uneasy. Then to add to the rather crowded classroom in walked the Maths inspector for the local authority. Fortunately we got on well, ‘Hi Steve just passing, thought I might pop in is it OK to see a lesson, I know you always do something different?’ “Of course’ I said with that sinking feeling that everything would go wrong in front of my audience.

Preparation

Draw some shapes on set of cards. One shape per card with the name of the shape on the card. For example, an equilateral triangle with name EQUILATERAL TRIANGLE on the card.  Have them laminated so the can be used by other classes and  year after year.


Organisation

The pupils have to work in pairs, writing descriptions They then have to compete against another pair.

The game

Each pair is given a card. They have to describe the shape but not use the words written on the card. So they must not use the word EQUILATERAL or TRIANGLE. They then have to write five or more sentences describing the shape. Remind then they can use negative sentences saying what it is not.  Once competed they have to read one sentence at a time to another pair, the object for them to identify the other shape in as few sentences as possible, You can devise a scoring system if you wish to suit your class. Once the first round is done you can then ask the pupils to hand the cards on to another pair.

Outcome

The pupils thought it was fun, different but harder than they expected. Which I interpreted as being stretching them. One student hurried off saying thanks, another said what a great idea, the inspector ‘I am going to use that idea at the next in service training, always knew I could pinch an idea or two from you see you Steve.’ 

For more on shape have a look at my post circles forever going round in loop

Thursday 23 May 2013

Circles – forever going round in the loop


Have you had the same problem as me? I teach the vocabulary and characteristics of circles, to say a 12 year old, and then perhaps two years later we have the same bright youngster and introduce the concept of π. What went wrong they couldn’t remember what the difference is between circumference, radius and diameter? We really are struggling now, forget π, they can barely remember the names yet alone what they represent. Yet year after year we repeat the same mistake. I have developed these simple steps that have helped improve my success rate.

Colour

How often do we ignore the use of colour when teaching? Not only is it more cheerful than the usual drab black and white it is a great aid to memory. Not too many colours otherwise it starts to look like an explosion at a paint factory.

Circumference

I start with the circumference. I draw it, in say blue, and now right the name underneath. But write it with a huge blue circle almost swallowing the word explaining this is how you remember it because the first letter of circumference tells you what it is.

Diameter

We now move on to the diameter. Explaining what this is I draw my blue circle again but draw the diameter vertically in red. Now I point out that the word tells you what the diameter it is just the vertical in the D. Make sure you draw the D as a capital D.


Radius

At bit of human biology never goes amiss! I tell them the bone in the forearm from the elbow to the thumb side of the hand is called the radius. When drawing a circle on the board I explain that I have to keep my elbow steady in one spot and move my arm to draw the circle. A little demonstration helps. Next I introduce Homer Simpson, remember he only has 3 fingers. I draw a circle draw the radius and with great artistic license draw Homer’s hand waving at us showing his radius bone.


These ideas are simple, silly but they really help in children remembering the names and concepts.  I continue to use the colours and remain consistent with their use. I encourage the students to do the same it aids memory and understanding.

Does anyone else have a good tip?

Has anyone tried it and had success or failure?

Make a comment and share your thoughts.


Wednesday 22 May 2013

Equations - your cut out and keep guide


Equations – your cut out and keep guide


Knowing what an equation is vital to progress in maths. This is a simple exercise in basic numeracy which can lay the foundations for future progress. and takes is a step removed from the normal worksheets.

Preparation

Give each pupil, or pair of pupils, as set of cards, five of them with numbers on two with the + sign, one with – on and one with = . Alternatively give them a sheet with the numbers and operations on and let them cut the cards.
Equation building cards


Instructions

Demonstrate how the cards can be used to make equations, the pupils will have the strong desire to call them SUMS but try to insist they are equations because one side equals the other. The students are to now make up as many equations as possible., they do not have to all the cards but cards cannot be repeated. Their results are to be written down. Perhaps give them a time limit the challenge is see how many they can make. Or ask for 20 equations to be made.

Extension

Change the numbers, increase the numbers or restrict them further.

Change the operations, add a multiplication sign or division.

Add a card with an x on it. The rules are now to make equations but they must have an x . They are then to record their results. They then swap their results with a neighbour. The partners have to mark each others.

What have you done to address this problem? Let me know.

What do you think? Please share your thoughts in the comments.

Tuesday 21 May 2013

Number snap


To practice multiplication tables is vital. Parents are very keen for their children to learn multiplication tables so any activity that aids progression is always welcome. Here is a simple game that can be adapted to suit all needs or abilities; it is particularly useful for younger ones.

Preparation
Lest assume you wish to practice the three times multiplication tables, prepare 20 cards, some with the questions, some with the answers. Cut them up. I always prefer to put them on to card and make them fairly big.

The game
Each pair of pupils is issued with a set of cards. The cards are to placed face down on the table. They then take it in turns to turn up two cards, if the cards match, say 3 X 3 = and 9, then they get to keep the cards. If they don’t match then the cards are turned face down again. The game continues until there are no more cards left, the winner is the one with the most pairs of cards.

Advantages and benefits
This game is fun. It uses a multisensory approach to learning where the pupils see, here and do something connected with maths rather than being a passive observer. It also encourages collaborative learning.

An excellent book for activites and ideas is Key stage 2/3 Numeracy games by John Taylor


What do you think? Please share our thoughts in the comments.